Have you ever imagined creating your own custom stickers, designed exactly how you imagined them, without having to rely on mass-produced options? Whether you’re dreaming of decorating your planner or even designing your own brand’s logo stickers, Cricut Sticker Paper opens up endless creative possibilities.
But we get it—maybe you’re thinking, “Where do I even start? How do I make sure these stickers turn out as amazing as they look in my mind?”
If that’s you, you’re in the right place. This guide will take you through each step, from designing to cutting and applying your stickers with Cricut Sticker Paper. Read this blog till the end!
Why Cricut Sticker Paper is a Must Buy?
Before we dive into the steps, let me ask you something: Have you ever bought expensive stickers, only to think, I could have made these myself? Well, with Cricut Sticker Paper, you can.
Here’s why it’s worth your time:
-
Limitless Creativity:
From personalized gift tags to planner stickers and beyond, you’re only limited by your imagination.
-
Professional Quality:
The paper’s durability and finish—whether matte, glossy, or transparent—gives your projects a polished look.
-
User-Friendly:
Even if you’re new to Cricut machines, the process is intuitive and fun.
Ready to create something unforgettable? Let’s start with what you’ll need.
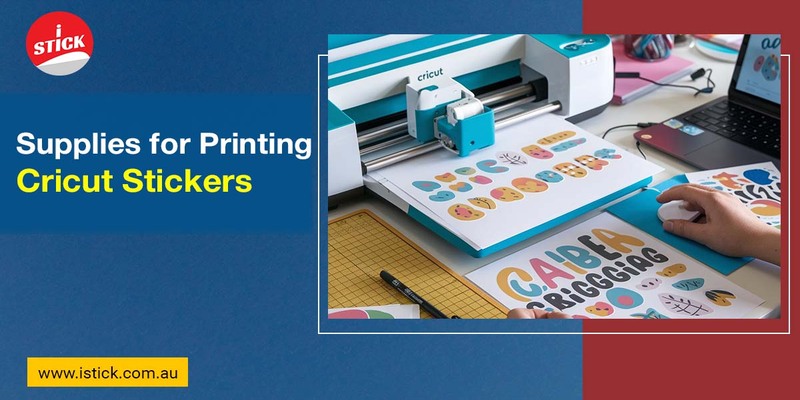
What are the Supplies You Need? Do you have everything you need to make magic happen? Here’s your checklist:
- Cricut Machine (Explore, Maker, or Joy – all work wonderfully)
- Cricut Sticker Paper (choose matte, glossy, or transparent)
- Inkjet Printer (essential for printable designs)
- Cricut Design Space (free software to design and cut your stickers)
- Cutting Mat (standard or light grip, depending on your sticker paper type)
- Scissors or Tweezers (optional, for finishing touches)
Got it all? Great! Now, let’s start designing.

Step 1: Design Your Stickers
Pause for a moment—what kind of stickers do you want to create? Are they playful decals for your laptop? Elegant labels for your homemade products? Or maybe, just maybe, they’re cute reminders to brighten someone’s day.
Here’s how to bring those ideas to life:
-
Open Cricut Design Space:
Launch the software and start a new project. Don’t worry if you’ve never used it before—its user-friendly interface will guide you.
-
Upload or Create a Design:
Do you have a specific image in mind? Upload it. If not, browse Cricut’s vast library of ready-to-use designs.
-
Customize Your Layout:
Arrange and resize your images to fit the 8.5” x 11” dimensions of Cricut Sticker Paper.
-
Add Text and Flair:
Want to personalize it further? Play around with fonts, colors, and layers to make your stickers truly unique.
Pro Tip: Feeling unsure about your design? Try a small test print first. Better safe than sorry, right?
Step 2: Load Your Cricut Sticker Paper
Here comes the moment of truth—placing the sticker paper on the mat. But wait, have you ever had your paper misalign and ruin an entire project? Let’s avoid that nightmare together.
-
Align Perfectly:
Place the sticker paper on your cutting mat, making sure it’s smooth and lined up with the grid.
-
Material Settings:
In Cricut Design Space, select the correct material type (e.g., “Printable Sticker Paper” or “Sticker Paper – Clear”).
-
Double-Check Everything:
Is the paper loaded correctly? Is the design scaled right? This tiny pause can save you from big regrets later.
Step 3: Print Your Design
Here’s where the suspense kicks in: Will your printer deliver vibrant, flawless colors? Will your design look as good on paper as it does on screen? Let’s ensure it does.
-
Send to Printer:
Select “Print then Cut” in Cricut Design Space, and send your design to an inkjet printer.
-
High-Quality Settings:
Choose the best print settings for a sharp, vivid finish. Trust me, this one small step makes all the difference.
-
Print a Test Page:
If you’re anything like me, you might worry about wasting sticker paper. Printing a quick test page on regular paper can ease those fears.
Pause and Reflect: Isn’t it exciting to see your design come to life? But hold on—the best part is yet to come.
Step 4: Cut the Stickers
Now for the moment of truth—cutting. Have you ever held your breath as your Cricut machine starts cutting, praying it doesn’t mess up? Let me tell you, there’s something magical about watching your machine work its precision-cutting magic.
-
Load the Mat into Cricut:
Place your printed sticker paper onto the mat and load it into the machine.
-
Let Cricut Do Its Thing:
Press “Go” and watch as the machine scans the registration marks, aligning perfectly with your design.
-
Kiss Cut or Die Cut?:
Decide whether you want a kiss cut (cuts only through the sticker layer) or a die cut (cuts through both the sticker and backing paper).
Pro tip:Will it cut cleanly? The answer lies in your settings. Too much pressure, and you risk cutting through the backing. Too little, and it won’t cut at all.
Step 5: Peel & Stick
The most satisfying part of the process: peeling your stickers. But here’s a question—where will you stick them? A laptop? A notebook? A gift package?
-
Careful Peeling:
For intricate designs, use tweezers to peel the stickers off gently.
-
Apply with Purpose:
Stick them to clean, smooth surfaces for the best results.
-
Admire Your Masterpiece:
Seriously, take a moment to appreciate what you’ve created.
Pause and Reflect: Doesn’t it feel incredible to hold something you made entirely on your own?
Troubleshooting Common Issues
Even seasoned crafters hit roadblocks. But don’t worry, We’ve got you covered:- Smudging Ink? Let your printed design dry completely before loading it into the Cricut.
- Misaligned Cuts? Recalibrate your Cricut machine for precision.
- Paper Jam? Check your printer’s feed settings and ensure the paper is loaded correctly.
Final Thoughts: What Will You Create Next?
Now that you’ve unlocked the secrets of Cricut Sticker Paper, what’s stopping you from creating your next masterpiece? From custom labels for your brand to personalized gifts for friends, the possibilities are endless.
